


















Lesson 44 of 47 · Projects and Practice
Project: build your household emergency plan
Create a one-page emergency plan for your home with contacts, medical information, roles and a meeting place, using a guided builder, and learn how to practice it with your household.
The best way to learn preparedness is to do it. In this project you will build a one-page emergency plan for your own household, step by step, and then rehearse it. It takes about an hour and it is the most practical thing in this course: the page you finish can be stuck on the fridge, saved in phones and handed to a babysitter or a neighbor.
You will gather the information, write it down using a builder that formats it for you, test the plan with a short drill and decide when to review it. Along the way you will use ideas from the whole chapter: the kit, the call, roles, the needs of children and older relatives and your local emergency numbers.
Educational information, not professional advice. This is a planning exercise. It does not replace a certified first-aid course, medical advice about anyone's health condition or the instructions of emergency services in your area. Keep sensitive medical details private and share the plan only with people you trust.
What you will learn
- How to gather and organize the information a plan needs.
- How to write a plan that someone else could follow in a stressful moment.
- How to rehearse the plan with a short drill.
- When and how to update it.
Key terms
- Emergency action plan: a short written plan of who does what, whom to call and where to go.
- Medical information sheet: a list of conditions, allergies and medicines for a person, kept where responders can find it.
- Meeting point: a place outside the home, and a second one outside the neighborhood, where everyone goes if they must leave.
- Drill: a short rehearsal of the plan, so that the steps are familiar.
Step 1: gather the contacts
Collect these and keep them in two forms: written on the plan, and saved in everyone's phone under a recognizable name.
- Emergency number for your country, and the number of the poison center.
- Your address, written exactly as you would say it, with a landmark or the nearest cross street, and how to enter the building (door codes, which floor).
- Family and a trusted neighbor who can help or take children.
- Doctor and pharmacy for each person, and the hospital you would normally go to.
- In case of emergency (ICE): many phones have an emergency information screen you can reach from the lock screen. Fill it in.
Step 2: write the medical information
For each person in the household, record on one line or one card:
- Name and date of birth.
- Allergies (especially to medicines, foods and insect stings) and what the reaction is.
- Long-term conditions, for example asthma, diabetes, epilepsy or heart disease.
- Regular medicines, including doses.
- Any prescribed emergency medicine, such as an adrenaline auto-injector or an inhaler, and where it is kept.
- Special needs: mobility aids, hearing or vision, communication.
Put a copy in the first-aid kit and keep another on the plan. Update it whenever medicines change.
Step 3: decide the roles and the places
A plan works when everybody knows their job. In a two-adult household you might write:
- Caller: Alex calls the emergency number, puts the phone on speaker and gives the address.
- Kit and AED: Sam fetches the first-aid kit and, if one is nearby, the defibrillator.
- Door: an older child opens the door and meets the ambulance.
- Children: the next adult takes care of younger children and pets.
Decide on places: where the kit is, where the fire extinguisher and the main water, gas and power controls are, where the nearest AED is (many cities have maps), and two meeting points for leaving the home.
Step 4: build the one-page plan
Use the builder below to turn your information into a clean text plan. It runs in your browser, so nothing is sent anywhere. You can copy the result into a document or a note. It is a convenience tool: check every line and adjust it to your household.
Step 5: rehearse
A plan that has never been used will have gaps. Run a drill of about ten minutes.
- Pick a scenario from the previous lesson. Say it out loud, for example "Dad has chest pain and cannot speak".
- Walk it through. Who calls? What do they say? Who fetches the kit? Where is it? Can everyone find it in under a minute?
- Time yourselves, and write down what slowed you: the kit was buried, the address was unclear, nobody knew the AED location.
- Fix the gaps and update the plan.
- Let children practice saying their name, address and "I need an ambulance" with a toy phone. Teach them how to call even if they do not have their own phone.
Step 6: keep it alive
- Review twice a year, when you check the kit. Update contacts, medicines and roles.
- Share it with babysitters, grandparents, visitors and neighbors who may help.
- Store copies on the fridge, in the kit, in the car and in phones.
- Refresh your skills with a certified course every one to three years.
Check your work
Use this short check to see whether the plan is complete. It does not judge quality; it only counts what you have covered.
Press Run (or Ctrl + Enter) to see the console output here.
No output.
Check your understanding
Quick check · 4 questions
of 4 answered You scored / 4 · perfect!
-
1. Why write the address as you would say it, with a landmark?
Clear location is one of the most valuable things you can tell a dispatcher. -
2. How often should you review the plan and kit?
Regular reviews keep contacts, medicines and dates current. -
3. What is the purpose of a drill?
A drill shows what slows you down so you can fix it. -
4. Where should medical information be kept?
Keep it findable for responders but private from the public.
Summary
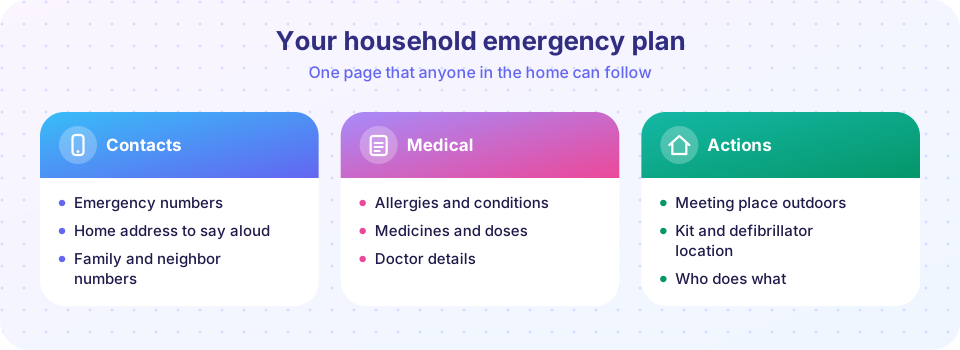
- A household plan has three parts: contacts, medical information and actions (roles and places).
- Write it on one page, store it in several places and share it with trusted people.
- Rehearse with a short drill and fix the gaps.
- Review twice a year and keep your skills current with a certified course.
Track your progress
Create a free account to tick off lessons and pick up where you left off on any device.
of First Aid and Emergency Care lessons completed