


















Lesson 33 of 45 · Testing and Debugging
Chapter 7 overview: testing and debugging
A plan for the day your first board arrives: inspect, check for shorts, power up safely, measure the rails and debug methodically. Overview of the chapter's lessons.
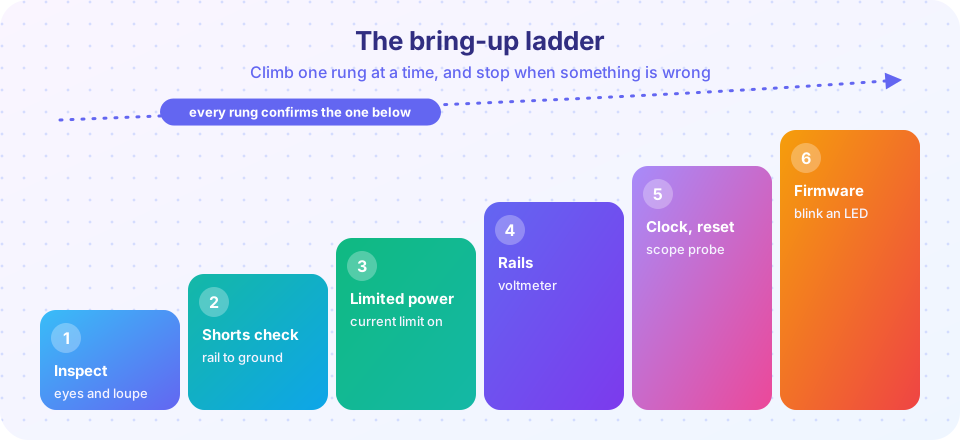
The package arrives. The board looks perfect, and the temptation is to plug it in and see what happens. Resist it. A first power-up with no preparation is how boards (and sometimes laboratory supplies and laptop USB ports) get damaged. Experienced engineers follow a bring-up plan: a short sequence of safe checks, each of which confirms the one before it.
This chapter teaches that plan, the instruments and probing habits that make measurements trustworthy, a method for hunting faults, and the design habits (test points, headers, quiet layout) that make the next board easier to test.
What you will learn
- Follow a safe bring-up sequence for a new board.
- Choose the right instrument for a measurement.
- Debug by isolating the problem instead of guessing.
- Plan test points and headers before you finish the layout.
Key terms
Bring-up: the first power-on and step-by-step validation of a new board.
Test point (TP): an exposed pad or loop provided for probing a net.
Current limit: a bench supply setting that caps the current a fault can draw.
Flying probe / ICT: automated electrical test of a bare board or assembly.
DFT: design for test.
The plan at a glance
Before power
First power
Life signs
What each lesson covers
| Lesson | Topic |
|---|---|
| Bring-up and debugging | The sequence, instruments, probing technique and fault isolation. |
| DFM, DFT and EMC | Layout habits that make boards buildable, testable and quiet. |
| Chapter review | Poster and ten questions. |
Common misconceptions
"If the schematic is right, the board will work." Assembly, parts and layout all add chances for faults. Bring-up finds them in order.
"Power it up first, then see." A current-limited supply costs minutes to set up and can save the board.
"Debugging is guessing." Good debugging is bisection: split the system in two and test which half is bad.
Try it
Press Run (or Ctrl + Enter) to see the console output here.
No output.
Check your understanding
Quick check · 3 questions
of 3 answered You scored / 3 · perfect!
-
1. What should you do before first power-up?
A resistance check finds shorts, and a current limit protects the board if one exists. -
2. What is a test point?
Test points make nets easy to reach with probes. -
3. Which approach is best for hunting a fault?
Bisection narrows down the problem quickly.
Summary
- Bring-up is a ladder of safe checks, each confirming the previous one.
- A current-limited supply and a shorts check come before first power.
- Isolate faults by splitting the problem in two.
- Plan test points and headers during layout.
Next: Bring-up and debugging
Track your progress
Create a free account to tick off lessons and pick up where you left off on any device.
of PCB Design and Prototyping lessons completed